Using Moxa Therapy for Pain Relief: A Guide to Targeted Moxa Applications
Dec 09, 2024
Moxa therapy has been a trusted method for natural pain relief for centuries, offering warmth and healing by stimulating specific areas of the body. If you’re dealing with lower back or knee pain, moxa therapy can be a simple yet effective addition to your wellness routine. In this guide, we’ll walk you through targeted applications for these common pain areas, with easy-to-follow steps and tips for optimal results.
Why Moxa Therapy Works for Pain Relief
Moxa therapy works by improving circulation, reducing inflammation, and promoting the body’s natural healing process. The heat generated from burning moxa penetrates deeply into the affected area, relaxing muscles and improving mobility. Targeting acupuncture points with moxa can provide localized pain relief and promote overall balance in the body.
How to Use Moxa Therapy for Pain Relief
1. Lower Back Pain
Lower back pain is often caused by muscle strain, poor posture, long sitting or standing, or tension. Moxa therapy can target key acupuncture points to reduce pain and improve circulation in the area.
Acupuncture Points for Lower Back Pain:
- DU-3: Pain relief of the lumbosacral, balance irregular menstruation.
- BL-23: Pain relief of the lower back, balance of the genital system, soothe tinnitus.
- BL-40: Pain relief of the back and lumbar, lower high blood pressure.
- GB-30: Pain relief of the thigh bone and fasciitis of the gluteal muscles, soothe leg pain.
- BL-57: Pain relief of the back and lumbar, relieve cramp of the venter of gastrocnemius muscles.
Step-by-Step Guide:
-
Prepare Your Skin:
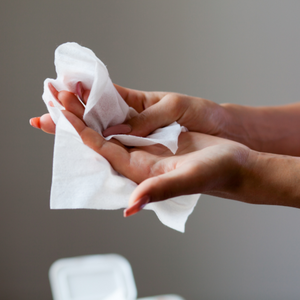
Before applying the smart Moxa device, it’s essential to ensure your skin is clean, dry, and free from any lotions or oils. This helps the moxa patch adhere properly and allows the device to work effectively. -
Prepare the Device:
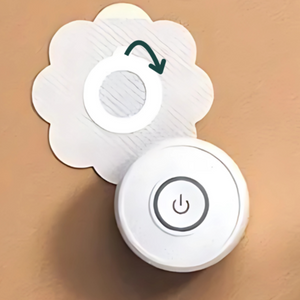
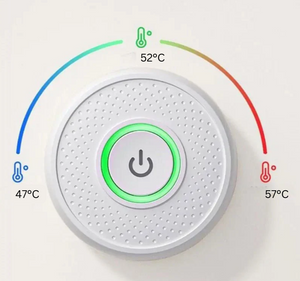
Attach the moxa patches to the smartpods. Turn it on and set up the temperature to a comfortable level for you. -
Locate the Points:
Use a diagram or guide to find the points. These points are near the center and sides of your lower back and calf. -
Apply Smartpods:
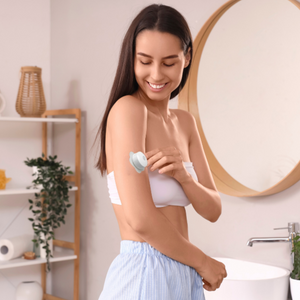
Place the patches with the smartpods firmly on the needed body spots, and find a relaxing posture to sit or lay down. But don’t lean on the smartpods. This extra pressure can increase the temperature and risk of skin burns. -
Monitor the Heat optionally:
Ensure the heat feels soothing, not too intense. If you feel discomfort, lower the temperature or stop moxibustion immediately. -
Aftercare:
Drink some warm water or herbal tea. Rest for 15–20 minutes after the session to allow the warmth to settle into your muscles.
2. Knee Pain
Knee pain can result from arthritis, injury, or overuse. Moxa therapy helps by reducing inflammation and improving joint flexibility.
Acupuncture Points for Knee Pain:
- ST-35: Pain relief of the knee joint and soft tissues.
- SP-9: Pain relief of the knee joint and surrounding soft tissues.
- SP-10: Pain relief of the knee joint and surrounding soft tissues.
- GB-33: Pain relief and stiffness of the knee.
- GB-34: Pain relief of the knee joint.
Step-by-Step Guide:
-
Prepare Your Skin:
Before applying the smart Moxa device, it’s essential to ensure your skin is clean, dry, and free from any lotions or oils. This helps the moxa patch adhere properly and allows the device to work effectively. -
Prepare the Device:
Attach the moxa patches to the smartpods. Turn it on and set up the temperature to a comfortable level for you. -
Locate the Points:
Use a diagram or guide to find the points. These points are all near your knee. -
Apply Smartpods:
Place the patches with the smartpods firmly on the needed body spots, and find a relaxing posture to sit or lay down. But don’t lean on the smartpods. This extra pressure can increase the temperature and risk of skin burns. -
Combine with Massage:
After moxibustion, gently massage the area for enhanced relief. -
Aftercare:
Drink some warm water or herbal tea. Elevate your leg and rest for 10–15 minutes.
Tips for Effective Moxa Therapy
- Consistency is Key: For lasting results, perform moxa therapy 2–3 times a week.
- Stay Hydrated: Drink water before and after sessions to support circulation.
- Combine with Stretching: Gentle stretches can complement moxa therapy for improved flexibility and pain relief.
When to Avoid Moxa Therapy
Moxa therapy is generally safe, but it should be avoided in the following cases:
- Open wounds or skin irritations.
- Pregnancy (unless advised by a professional).
- Sensitivity to heat or certain medical conditions—consult your doctor first.
For other serious health concerns, read our FAQ page.
Conclusion: Natural Pain Relief Made Simple
Moxa therapy offers a safe, natural way to relieve lower back and knee pain while promoting relaxation and circulation. With a few simple tools and consistent practice, you can incorporate this ancient healing technique into your modern wellness routine.
Ready to try moxa therapy? Check out our collections and explore their benefits for pain relief today.


